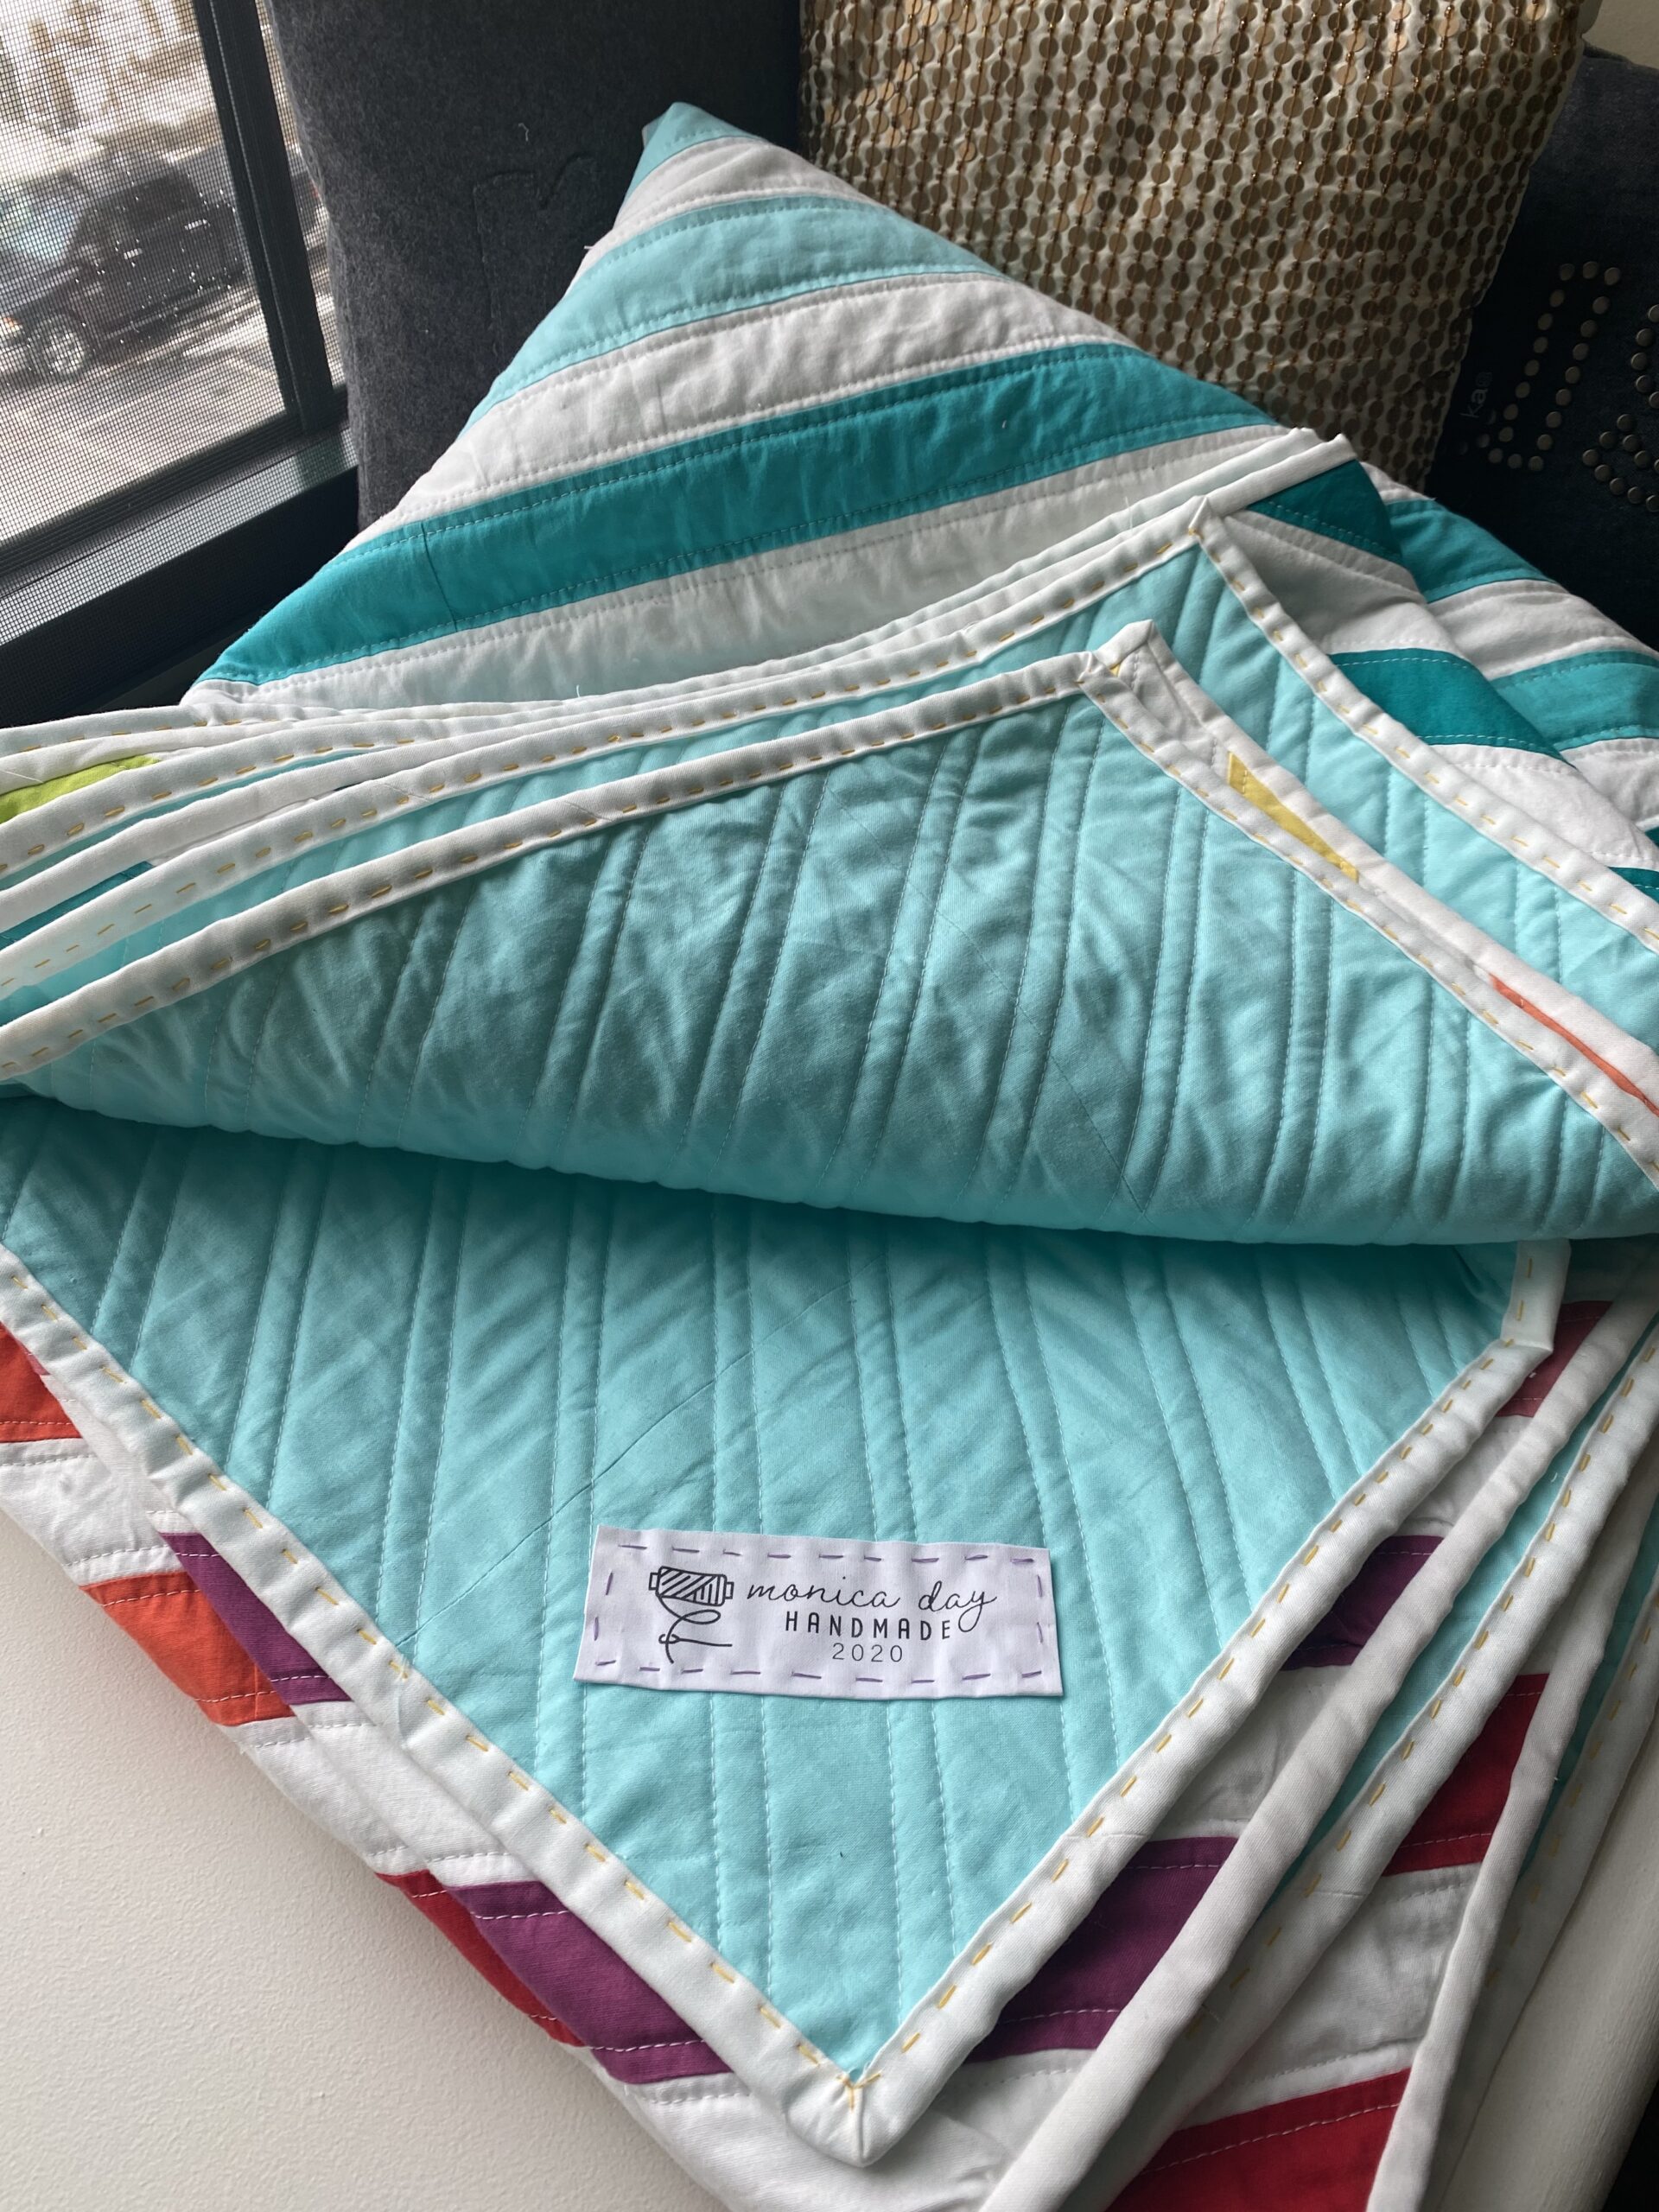
Fabric labels are a great addition to any craft project. The uses are limitless. I started adding these to my quilts and can’t believe I didn’t do it from the beginning. You can purchase printable fabric sheets that work with your inkjet printer. They vary in price but are very easy to use. My issue with the ones I’ve tried has been the texture and material. I decided to do a Google search for alternatives and came across many different ways to create labels. I put some trial and error and pieced together some different techniques to come up with something that has worked great for me.
There are just a few things you’ll need to do this. If you’re a crafter, you probably already have them.
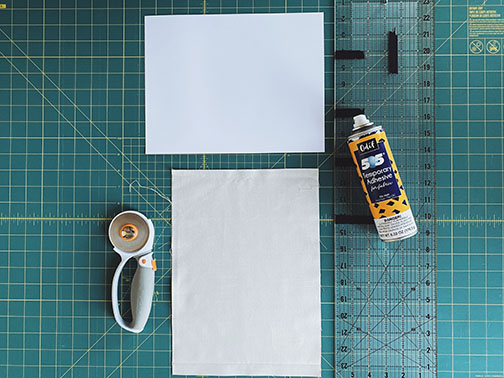
- A sheet of paper that will fit in your computer. (I used HP Premium 32 paper for sturdiness.)
- A piece of fabric slightly larger than your paper. (I used a lightweight 100% cotton muslin.)
- Rotary cutter or scissors
- Ruler and cutting mat if using a rotary cutter
- Temporary adhesive (Like 505 spray)
- Distilled white vinegar
First, spray the paper with the spray adhesive. Make sure your work area is covered. I used a baking pan covered with foil to contain any overspray. Next, apply the fabric so that it complete covers the paper. Press down to make sure it’s completely adhered. If you see any corners lifting, spray with a little of the adhesive. We do this to prevent jams in the printer.
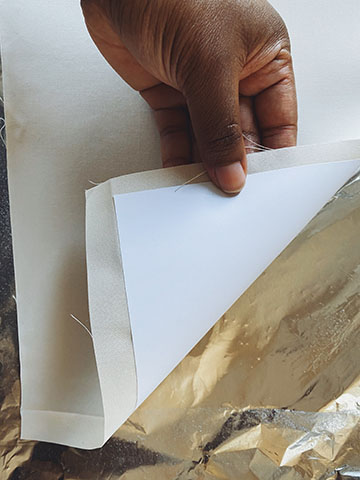
Now that our fabric is securely adhered to the paper, it’s time to trim. You want to make sure you have no fabric hanging over the edge of the paper. I used my rotary cutter and ruler to trim my paper fabric sandwich. You can cut the paper slightly smaller to make sure there’s no overhang. Once, your fabric has been trimmed, you can print your design. I designed my logo in Illustrator and Photoshop using a template I got from Creative Market. If you don’t have Illustrator, try this option or this option. Let me know if you want to learn more about creating a logo.
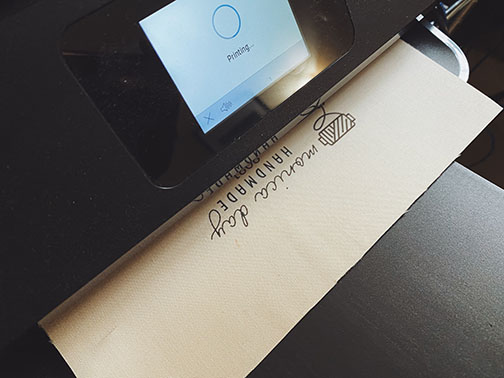
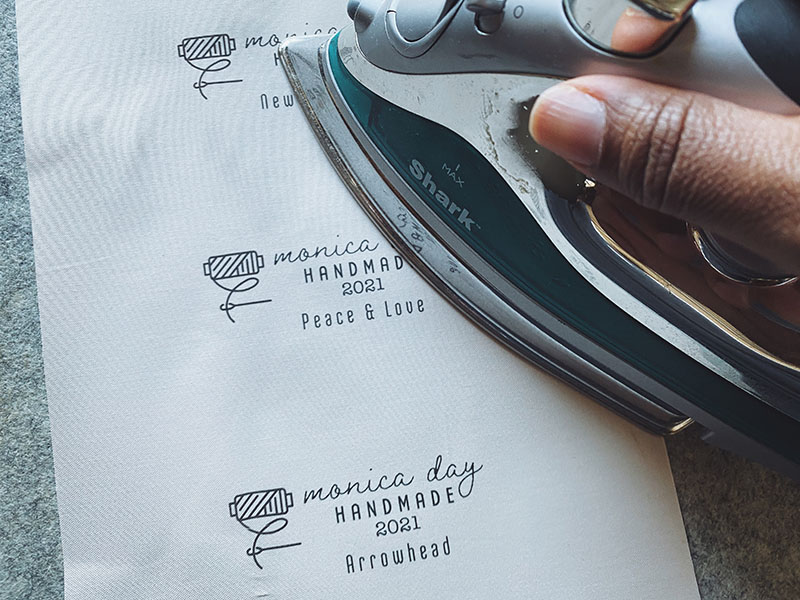
Printing can be tricky. Home printers are not designed to print on fabric so take caution when you do this. You are truly at your own risk. I set my print settings to just print regularly and one-sided. Make sure you insert your fabric correctly so that your print comes out the way you intend. Your paper tray should have an icon to show you which way the printable side goes. Just look for the paper icon and notice where the lines are. I like to remove all the paper from the paper tray and just insert my fabric-paper to print. Once it’s finished printing, let the ink on your fabric dry for at least 10 minutes.
The next step is to set the ink in the fabric. This is what will make it permanent and keep it from bleeding. Now, that your ink is dry, let’s press the fabric. Go ahead and remove the fabric from the paper. It should be easy and you can reuse the paper with your next fabric print. Using a hot iron, press down over the printed image and text. You’ll want to apply heat for about a minute. I like to use a piece of scrap material as a barrier but it isn’t necessary. Keep moving the iron to prevent scorching your material. Make sure you’re pressing by lifting the iron whenever you move it.
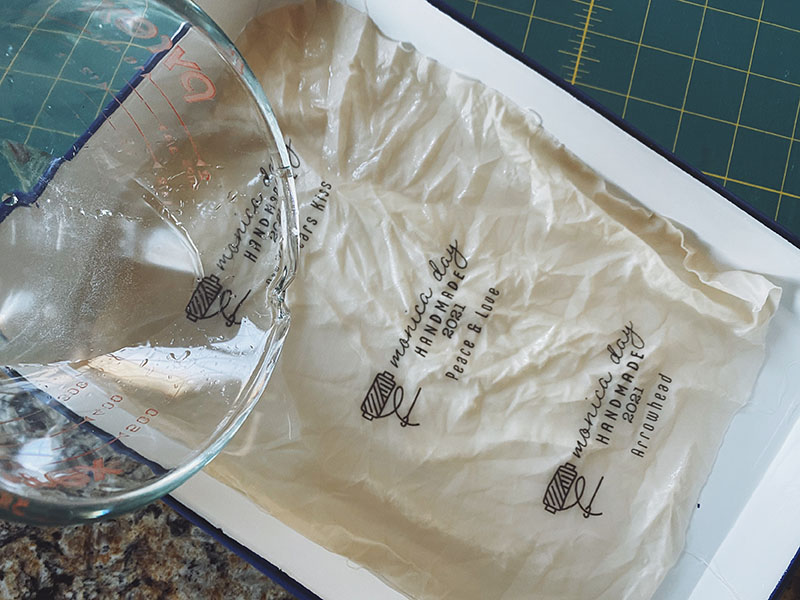
This next step is our moment of truth. It’s time to set it with vinegar. Place the fabric in a shallow pan and cover with vinegar. I usually use about half a cup of white vinegar. You need just enough to cover the fabric. Let it soak for about 5 to 10 minutes. Next, rinse your fabric with cold water. You should have no bleeding. Now let it dry flat.
I let my fabric dry overnight. I use my rotary cutter to cut the fabric down to size and then press the wrinkles out. You can attach it to your quilt or other items in a variety of different ways. Some people like to use a stabilizer as well.
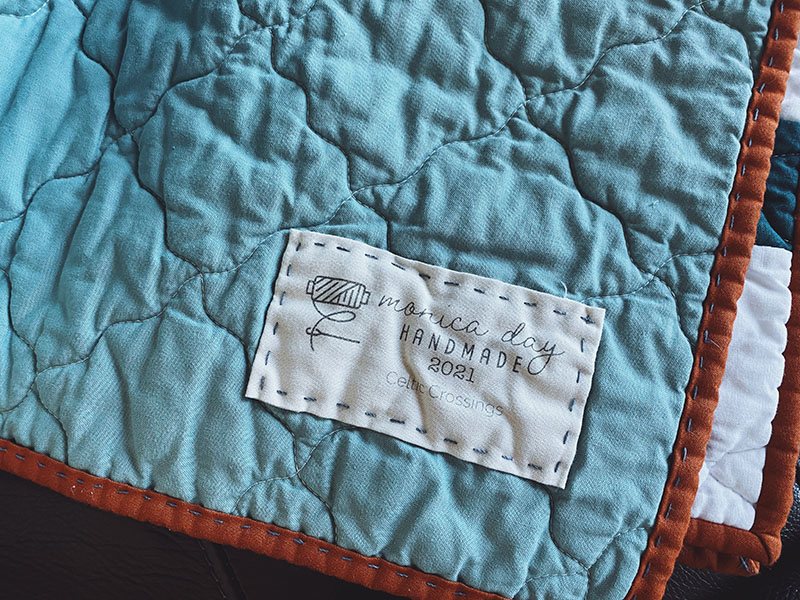
The possibilities are endless. How will you use this fabric printing technique?